
Accounts
Accounts allow users or groups to track and manage their usage by linking activities like printing, scanning, or copying to specific accounts. This helps in organizing and allocating costs accurately. For example, a teacher who handles both English and Math can charge usage to the respective subject accounts. It ensures better visibility and control over how resources are used.
Here, you will get two options:
Import Accounts in bulk using a .csv file.
Create Accounts directly from UI.
📘 Instructions
A step-by-step guide to create an Account-
Log in to your account and navigate to the Management section.
Here, you will see the Accounts option. If not, please refer to this- Permissions and add permissions for Accounts.
Now, click go to Accounts, and here you will get two options,
Upload CSV- You can download a sample CSV template and fill that template as per your requirement and then hit the Upload CSV button to upload your custom .csv file. You can add multiple accounts directly using the .csv file.
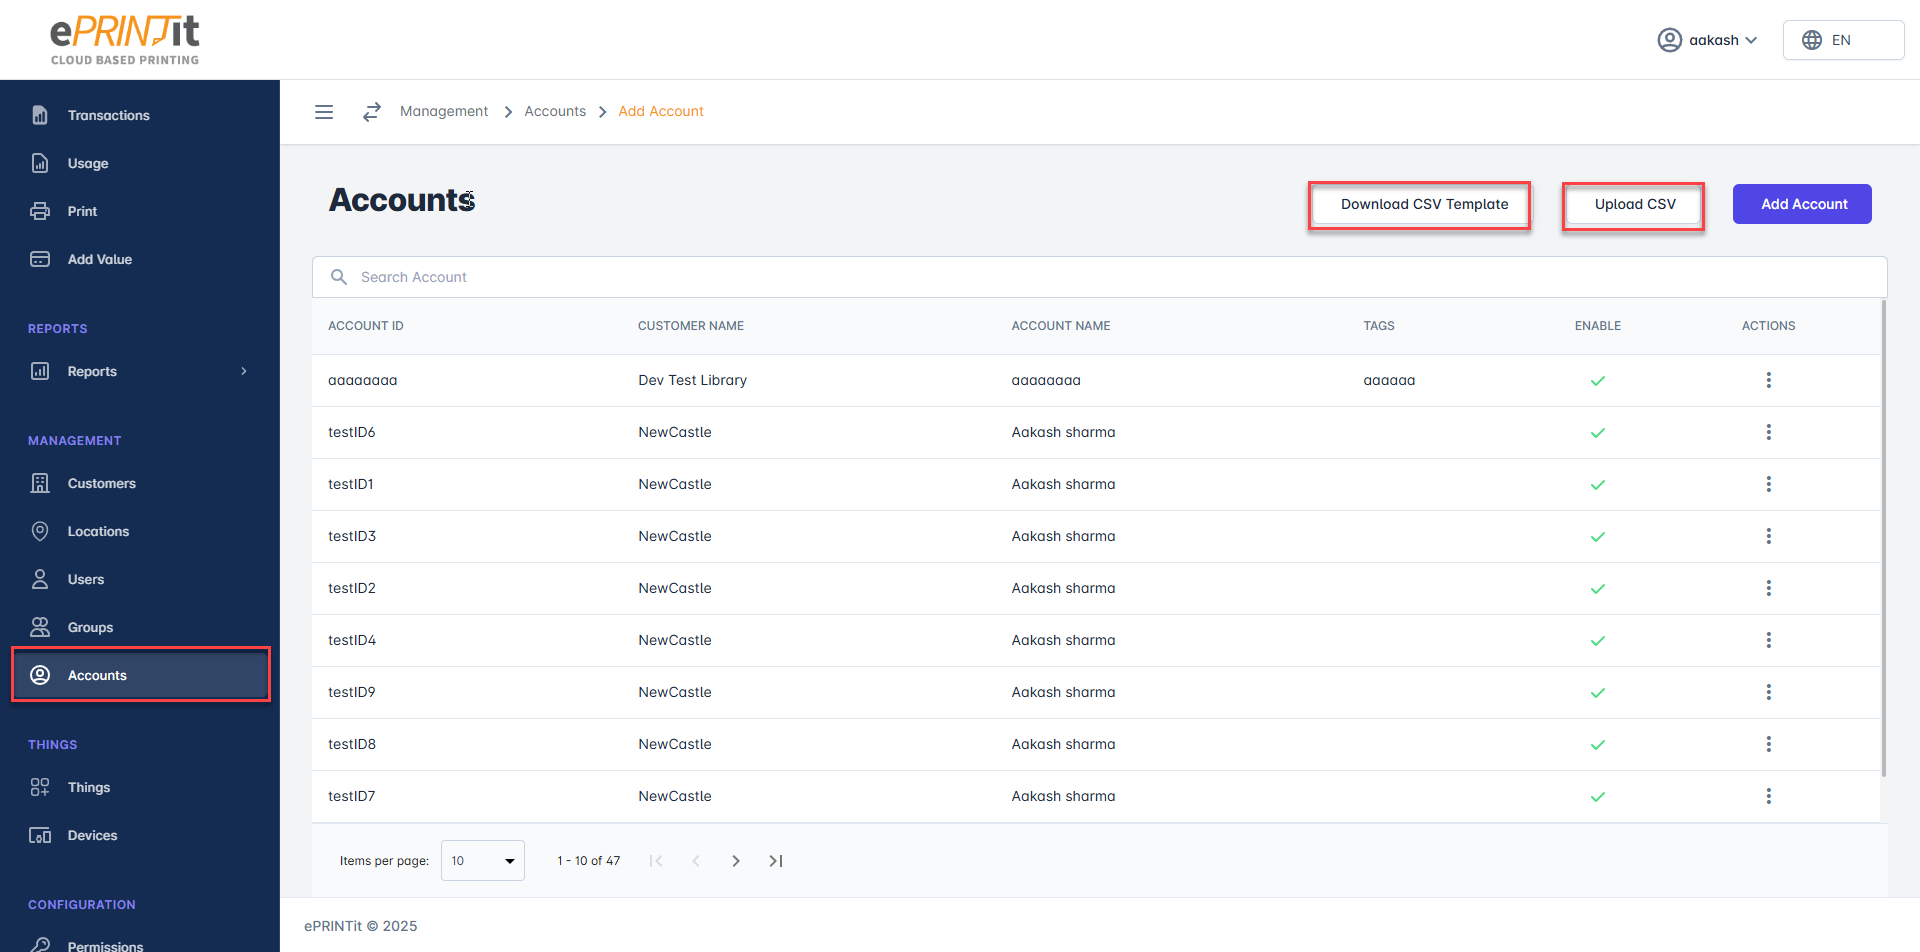
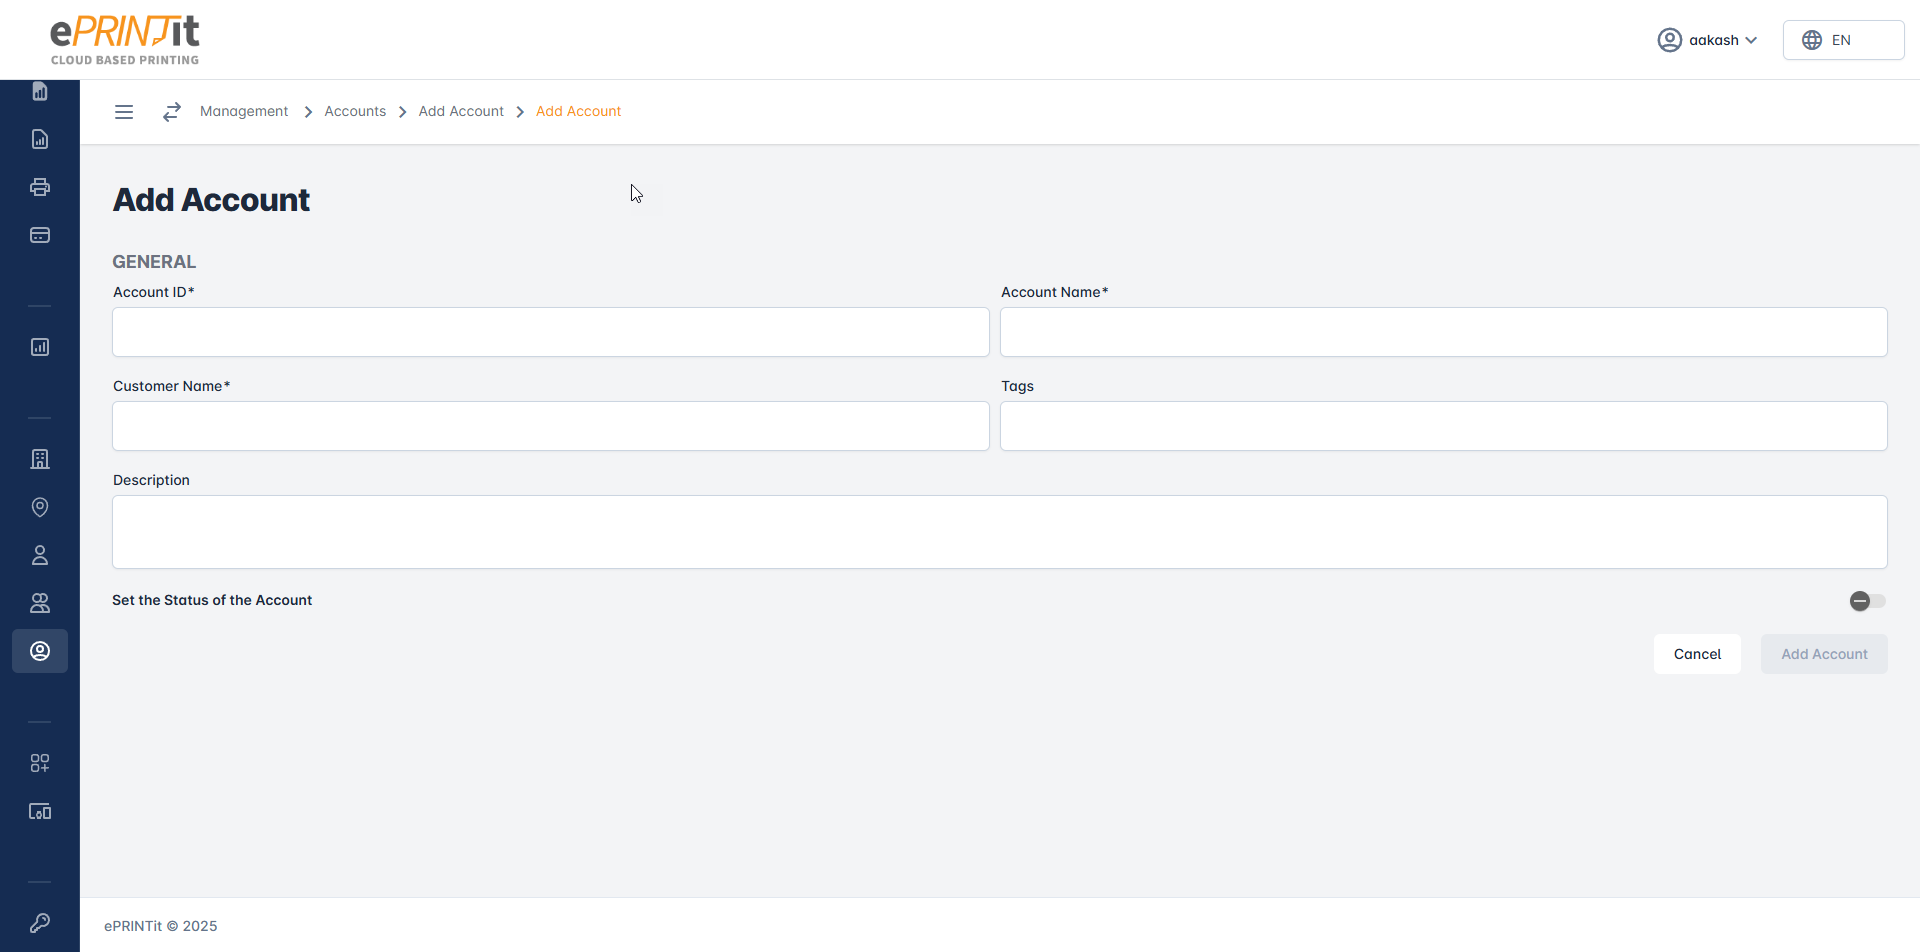
Add Account- You can directly add an account from UI. Just click on the Add Account button and then fill in all the fields and hit the Add Account button.
If you do not see any options mentioned above, then please refer to this doc- Permissions or ask your admin to add permissions.