
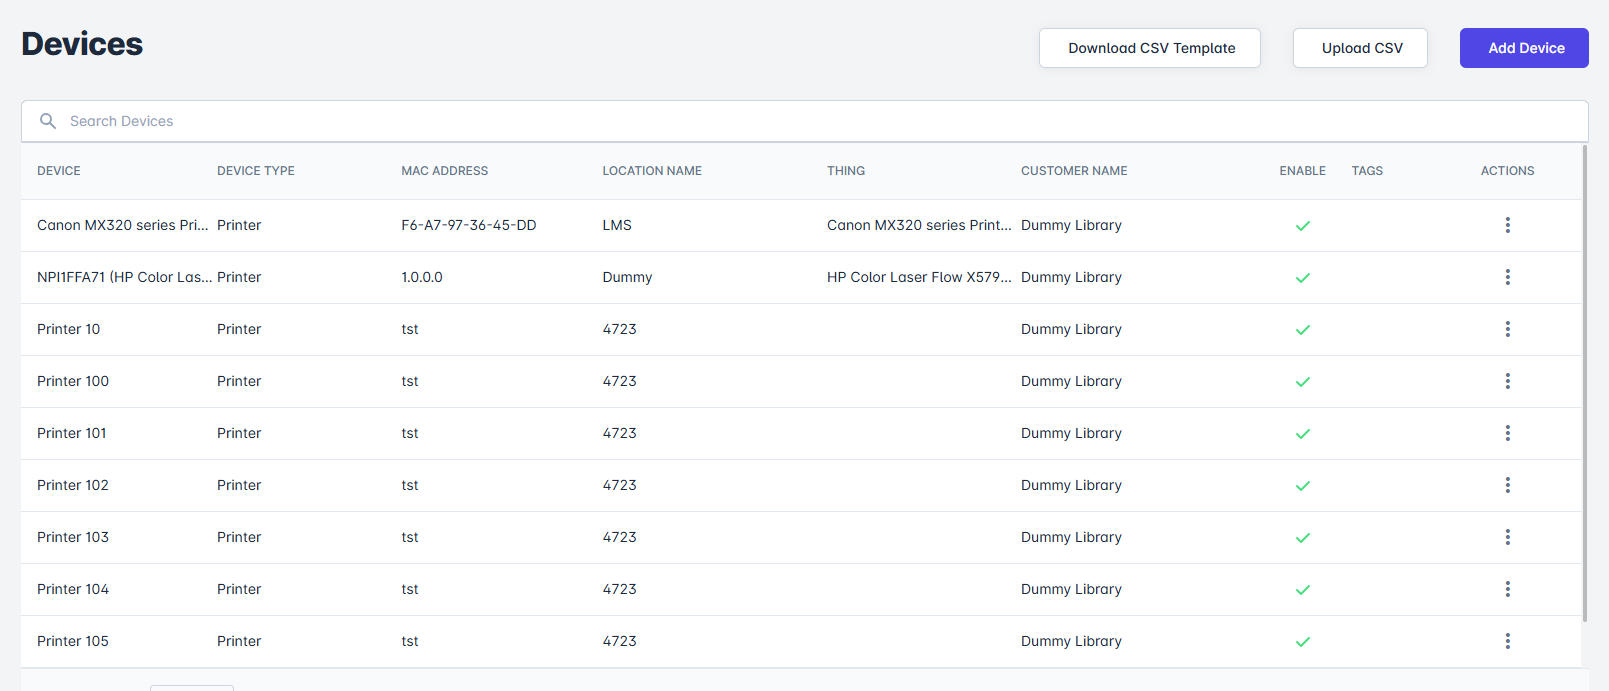
Devices
In ePRINTit SaaS, a device can be either a Printer or a Computer
Getting Started:
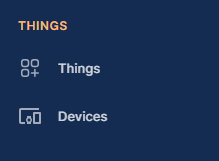
To access the Device screen, the user simply needs to login to the ePRINTit SaaS and on the menu bar navigate to the Things/Devices area. This feature is managed by permissions and the user must be associated to a group that allows the user to access this option. To get more information about groups and how to associate it to a role type that has this permission, click here.
📘 Instructions
Devices | Adding-a-New-Device
Devices | Updating-an-Existing-Device
Devices | Deleting-a-Device
Adding a New Device
Click the Add Device button.
Enter the device’s required information.
Click the Add Device button to create the new device.
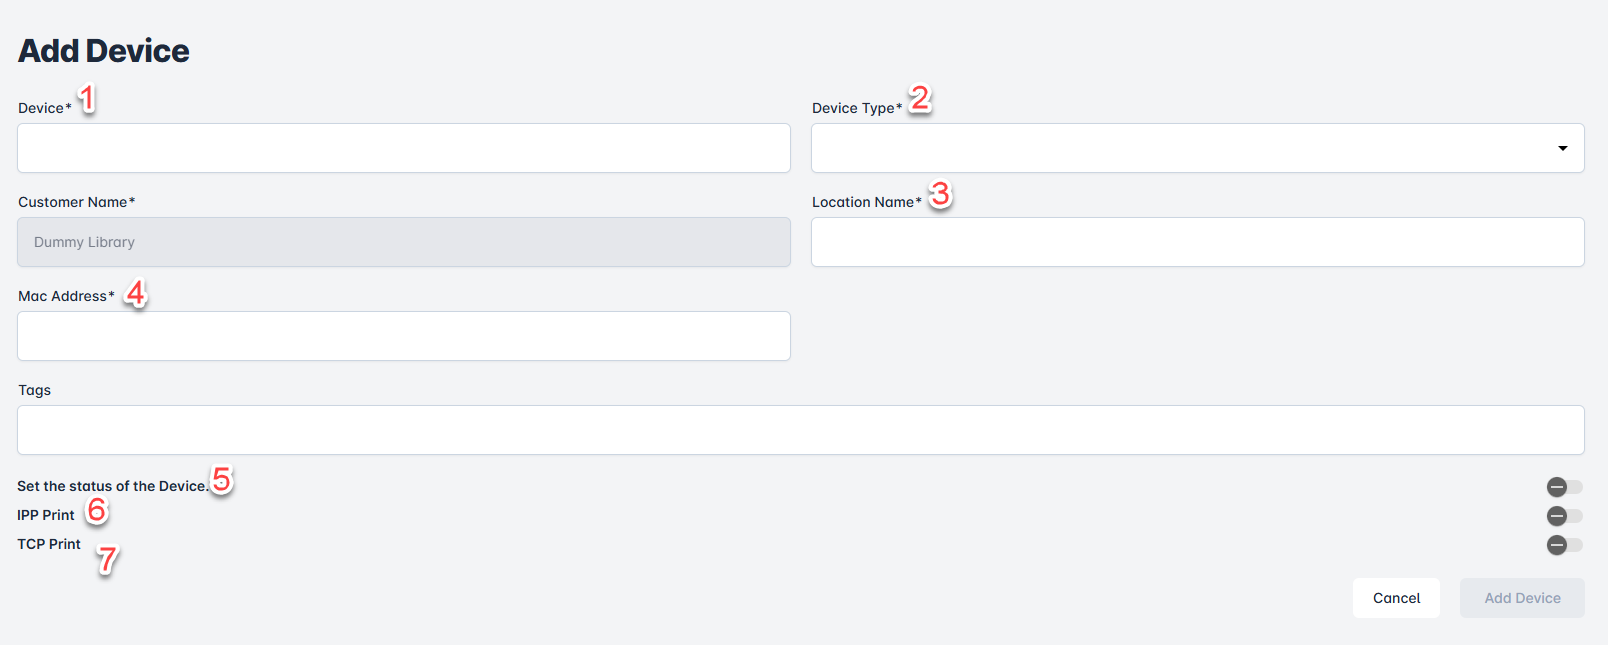
Device
Enter the name of Device hardware.
If the device is a printer, the device name must be the exact Printer Name.
Device Type

Printer
Name of the local print queue on the computer used to print jobs.
Computer
This would be the NetBIOS name of the computer on the network. This name should match exactly.
Location Name
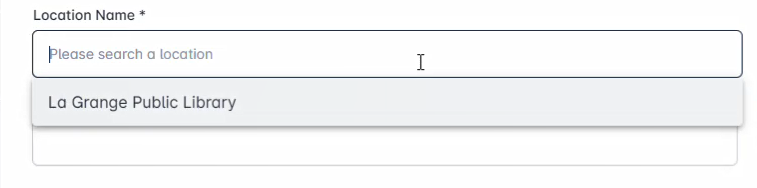
Dropdown list of associated locations to the customer selected, must select a location.
Mac Address
The MAC Address is a unique identifier assigned to the printer. It is used to identify the device on a network and can be found on the printer's label or in the network settings. To locate the MAC address on your printer, follow these steps:
Power on the printer and access the network settings. This can usually be done through the control panel or the printer's web interface.
Look for the MAC address field or label. It may be labeled as Ethernet MAC or Physical Address.
Write down or copy the MAC address, as it may be required when setting up the printer on a network.
The MAC address is formatted as a series of 12 characters, separated by colons (XX:XX:XX:XX:XX:XX).
Please make sure to have the MAC address handy when setting up your printer on a network, as it may be required for configuration purposes.
Set Status of the Device
The device status field is used to indicate the current status of a device. This field is essential for keeping track of device activity.
To update the device status, you can use the toggle field. The available options are:
Active: The device is currently active.
Inactive: The device has been deactivated.
Make sure to set the status toggle to enable the Device.
Make sure to select ADD to create a new Device you will receive a toast notification confirming creation.
IPP Print
The Internet Printing Protocol (IPP) is a network printing protocol that enables users to send print jobs and manage printing tasks over local and internet networks. If the printer supports IPP protocol, this field can be enabled.
To update the IPP Print, you can use the toggle field. The available options are:
Inactive: The IPP Print is currently deactivated.
Active: The IPP Print is currently active.
When IPP print is enabled, the following fields will be available to be configured:
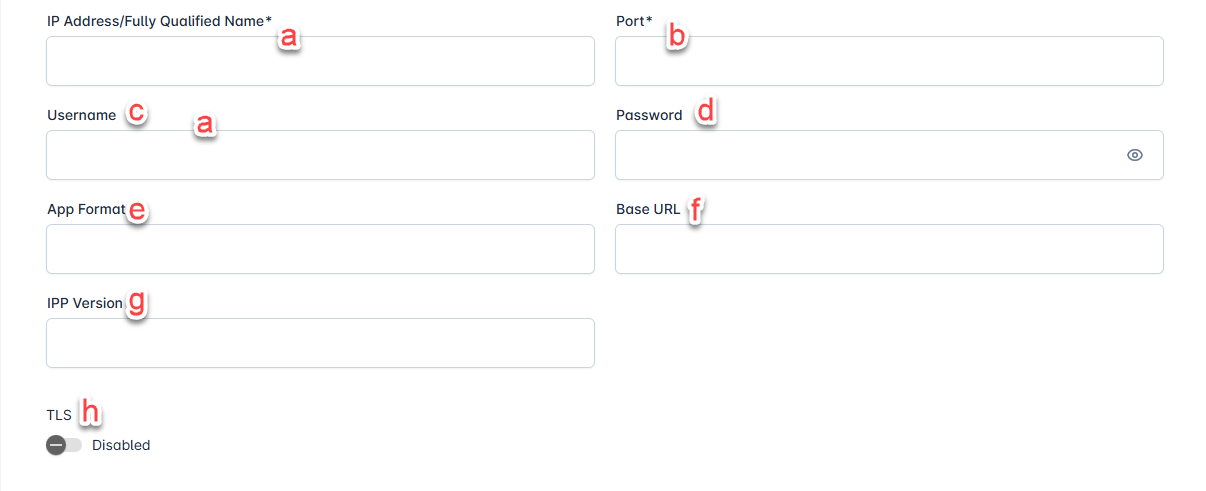
IP Address/Fully Qualified Name
Printer's IP address or hostname
Port
Port number opened in the firewall. Usually 631.
Username
Printer username used for authentication.
Password
Printer password used for authentication.
App Format
Document formats supported by printer. Example application/pdf, application/postscript, application/vnd.hp-PCL
Base URL
Printer URI supported. Example "/ipp/print"
IPP Version
Supported version, example: 1.0, 1.1, 2.0, etc
TLS
TLS is used to secure connections between devices (computers, mobile devices) and printers, especially when using protocols like IPP over HTTPS (IPPS).
To update the TLS, you can use the toggle field. The available options are:
Inactive: The TLS is currently deactivated.
Active: The TLS is currently active.
When TLS print is enabled, the following field will be available to be configured:

Print Secure URL
URL that will establish the encrypted connection using TLS to receive data.
TCP Print
Transmission Control Protocol, which ensures that print jobs (data) sent from a computer or mobile device to a printer arrive complete, in order, and without errors. If the printer supports TCP protocol, this field can be enabled.
To update the TCP Print, you can use the toggle field. The available options are:
Inactive: The TCP Print is currently deactivated.
Active: The TCP Print is currently active.
When TCP Print is enabled, the following fields will be available to be configured:

IP Address/Fully Name
Printer's IP address or hostname
Port Number
Port number opened in the firewall.
Only one of the protocols can be enabled on the printer at a time; both cannot be enabled simultaneously.
When IPP and TCP protocols are disabled, the job are sent to the printing queue (device). When IPP or TCP protocol is enabled, the jobs are sent directly to the printer.
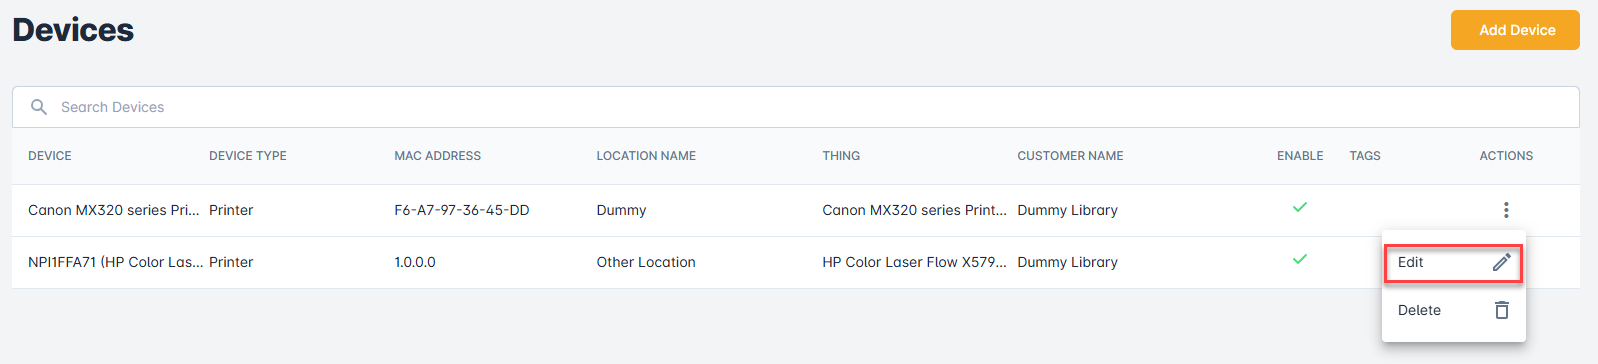
Updating an Existing Device
Click the three dots under the Actions column and select Edit option.
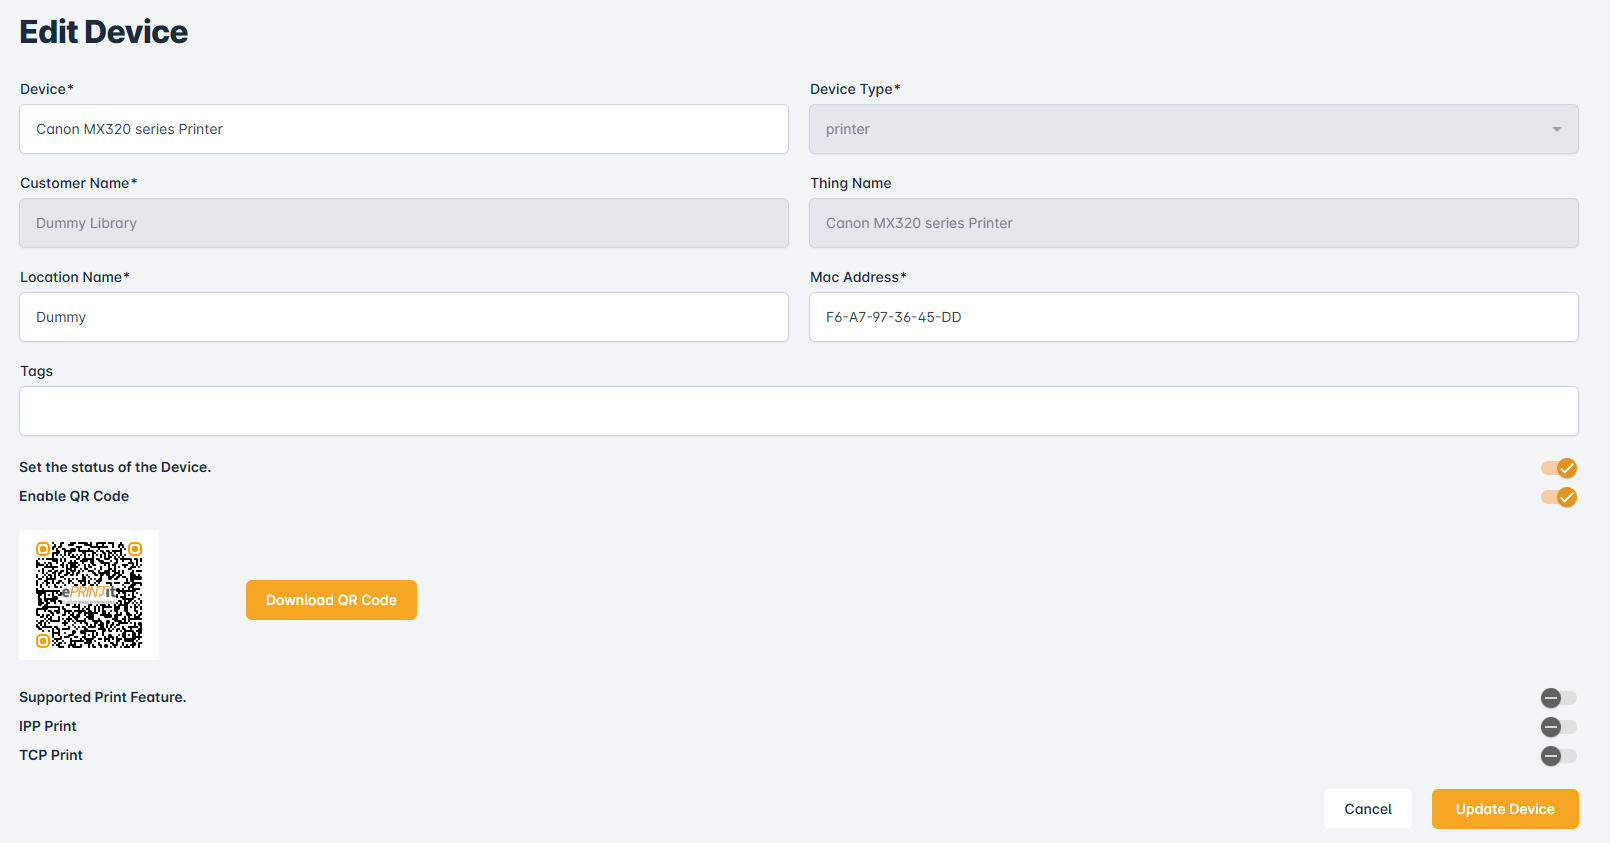
The Update Device screen will be displayed. After the necessary changes are made, click the Update Device button.
Deleting a Device
Click the three dots under the Actions column and select Delete option.
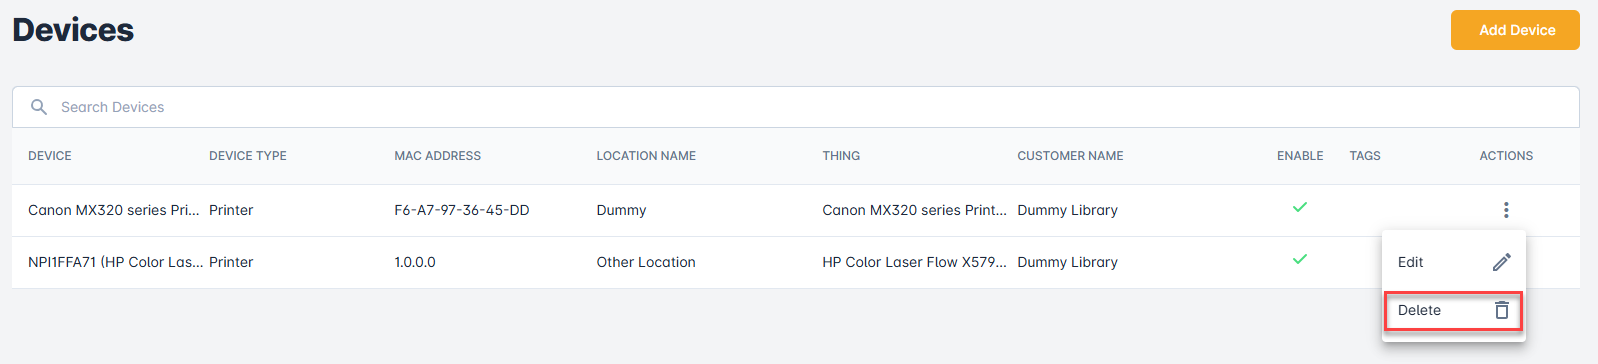
A confirmation message will be displayed. Once confirmed, the device will be deleted from ePRINTit SaaS system.