Print (User Guide)
This option allows the user to upload files to the ePRINTit SaaS system to be printed, allows the user to print or delete one or more jobs and displays all jobs submitted to the customer by the logged users.
Getting Started:
To access the Print screen, the user simply need to login the ePRINTit SaaS and on the menu bar navigate to the User Portal/Print area. This feature is managed by permissions and the user must be associated to a group that allows the user to access this option. To get more information about groups and how to associate it to a role type that has this permission, click here.

📘 Instructions
Print (User Guide) | Uploading-a-File
Print (User Guide) | Checking-Uploaded-Jobs
Print (User Guide) | Printing-a-Job
Print (User Guide) | Email-Printing
Uploading a File
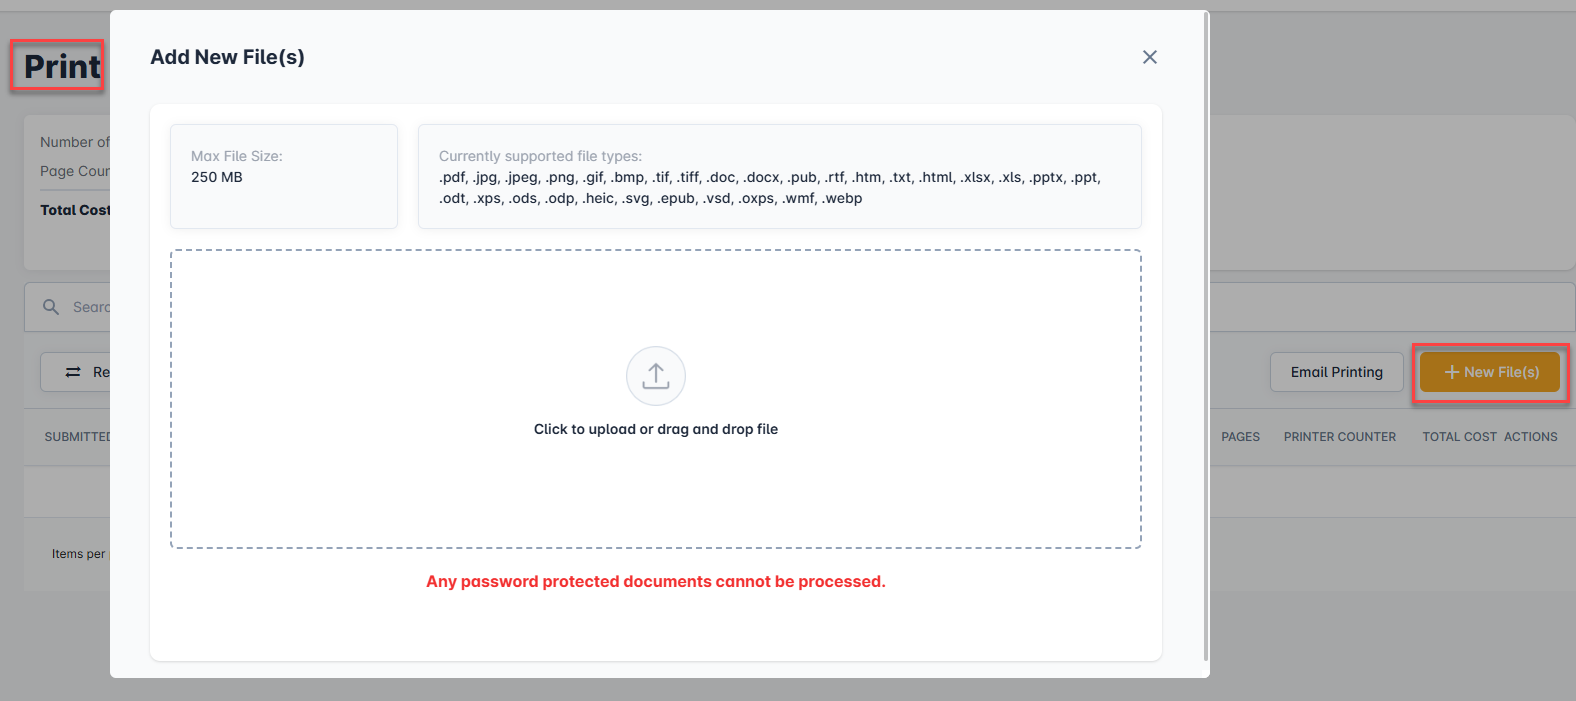
Click on + New file(s) button and select one of the available options to submit the file.
Select the files to be uploaded.
Click on the arrow on the right side of each one of the fields to configure de printing details.

Paper Size
User can select the paper size from this dropdown (Letter/Tabloid/Legal/A4/A3/As Saved/Ledger).
Layout
User can select the layout type from this dropdown. (As Saved/Portrait/Landscape).
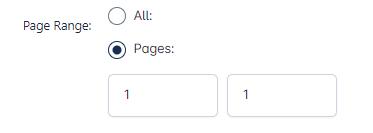
Page Range
Using the toggle bar user can select the paper range (All/Pages).
Copies
Type the number of copies.
Staple
Select in which side of the paper is the stapled.
Color
Type the color type from this dropdown (Grayscale/Color).
Duplex
User can select the duplex type from this dropdown (One-Sided/Two-Sided).
Click on Upload button.
Checking Uploaded Jobs
Click on Refresh Jobs button.
Printing a Job
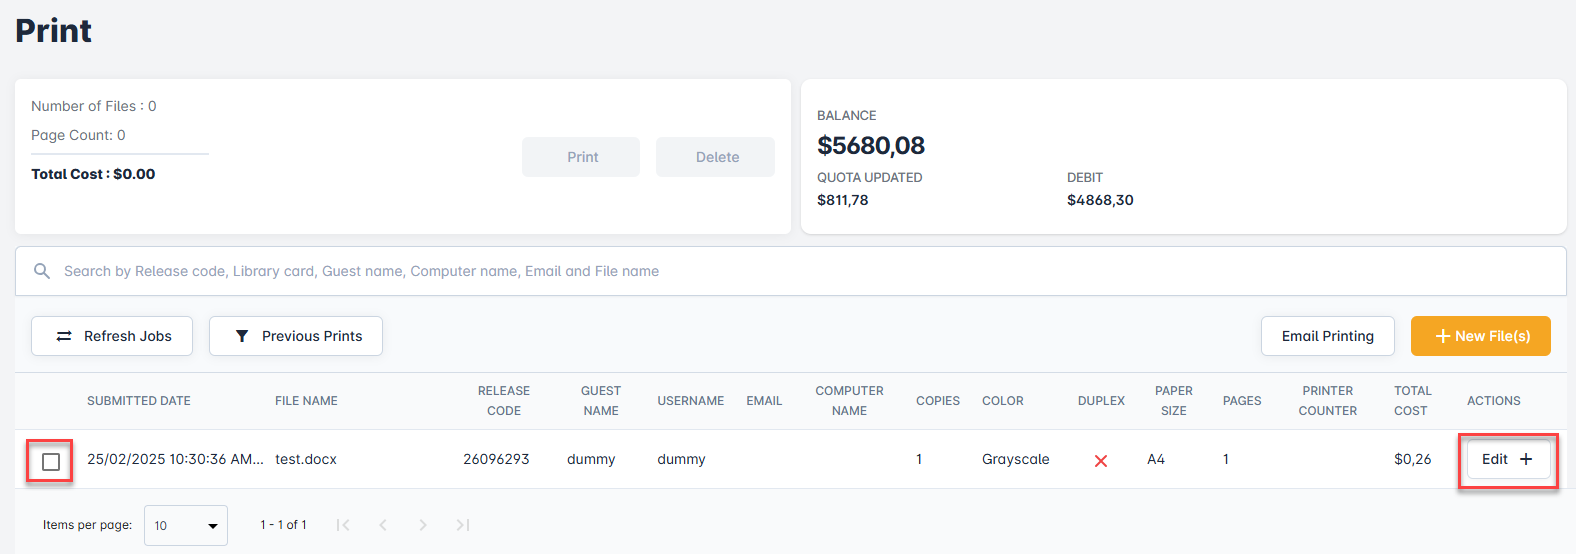
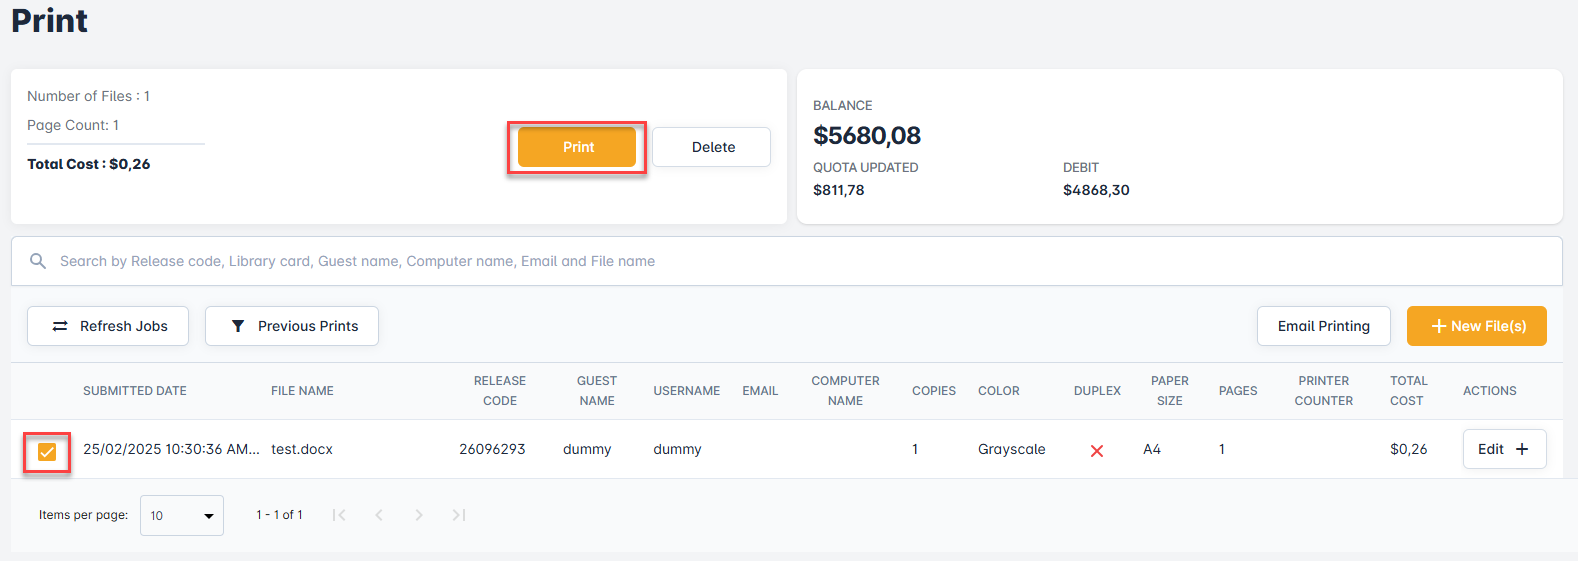
After the file or files are uploaded, the user has the option select which one would be printed and/or modify the printing options and print them. To modify the printing options, click on the arrow displayed on action column and all available printing configuration will be displayed.
Click on the Print button.
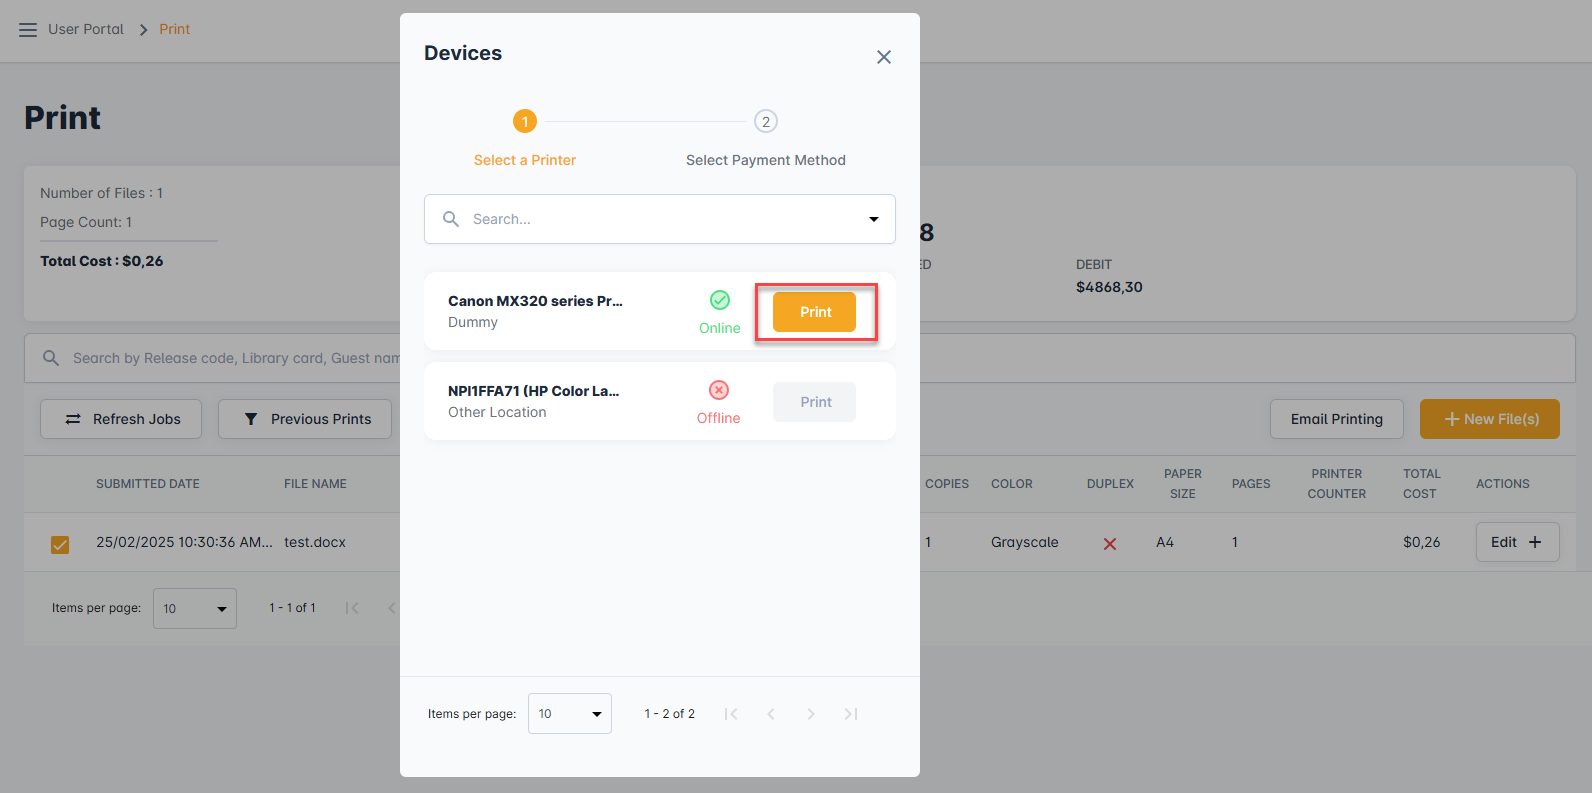
Select the printer where the job will be printed and click on the Print button.
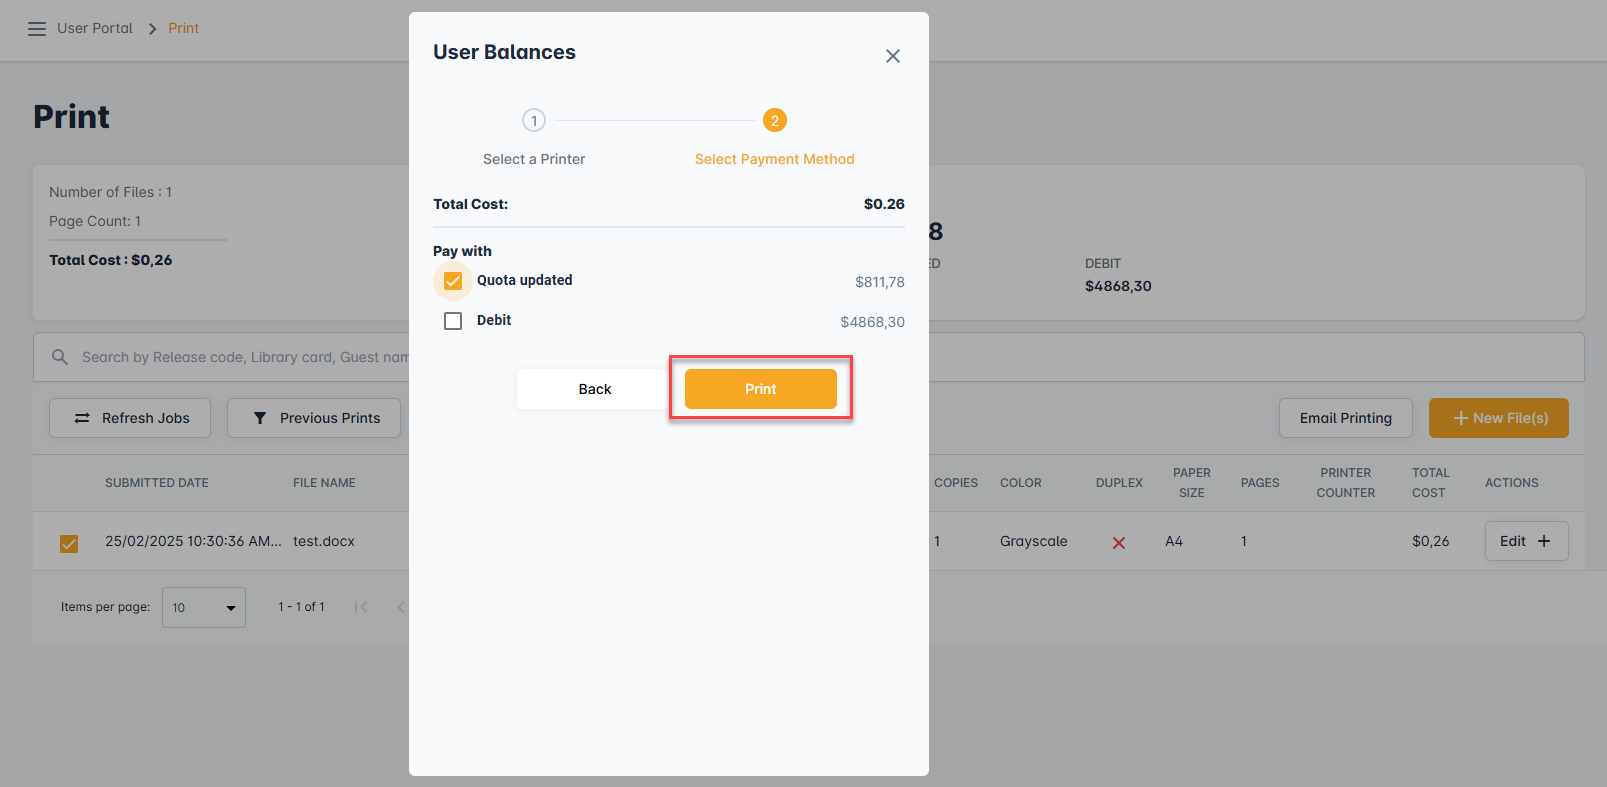
Select from which account the balance will be deducted and click on Print button.
The progress of the print job will be displayed.
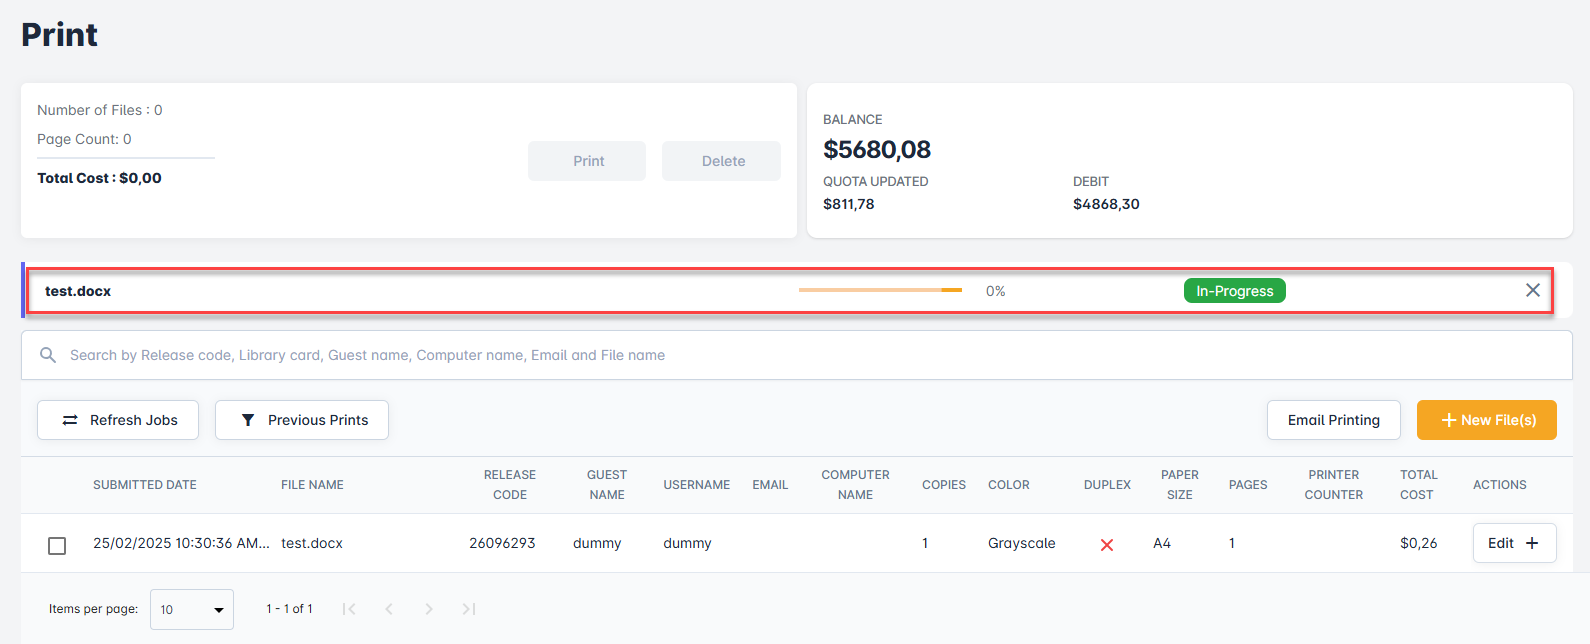
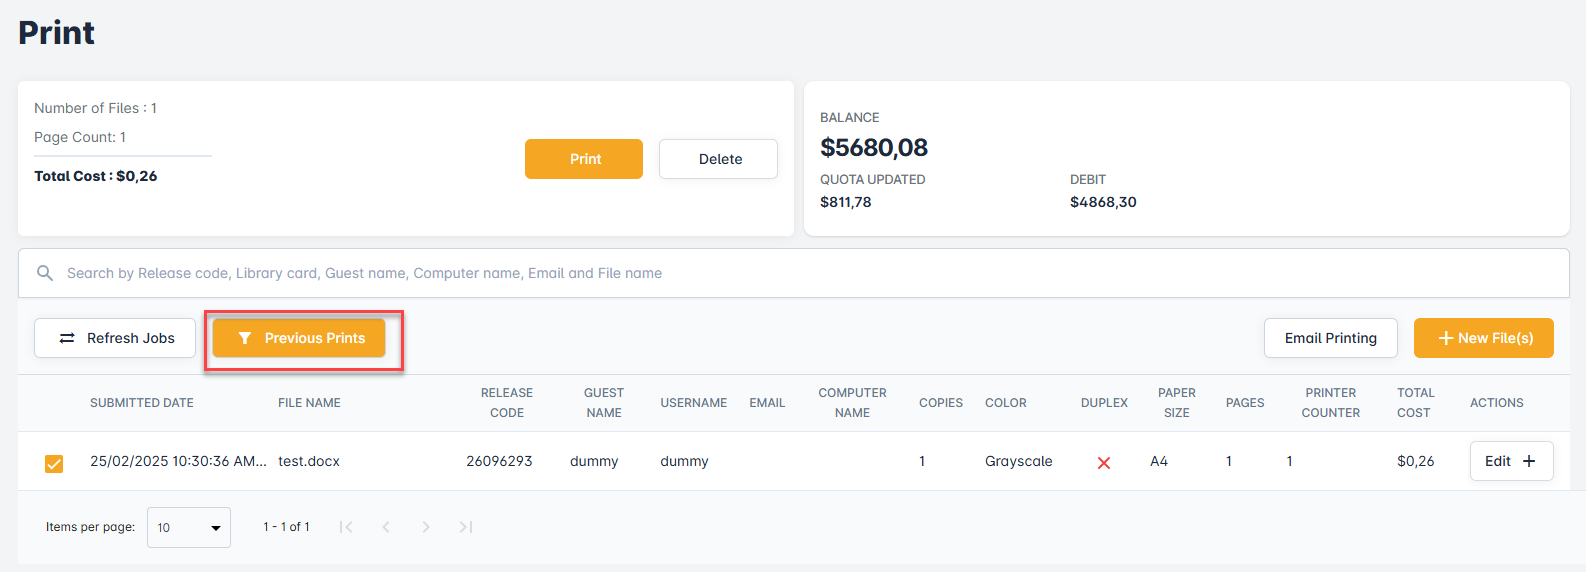
After the job is printed, it can be found in Previous Prints jobs. The job can also be re-printed:
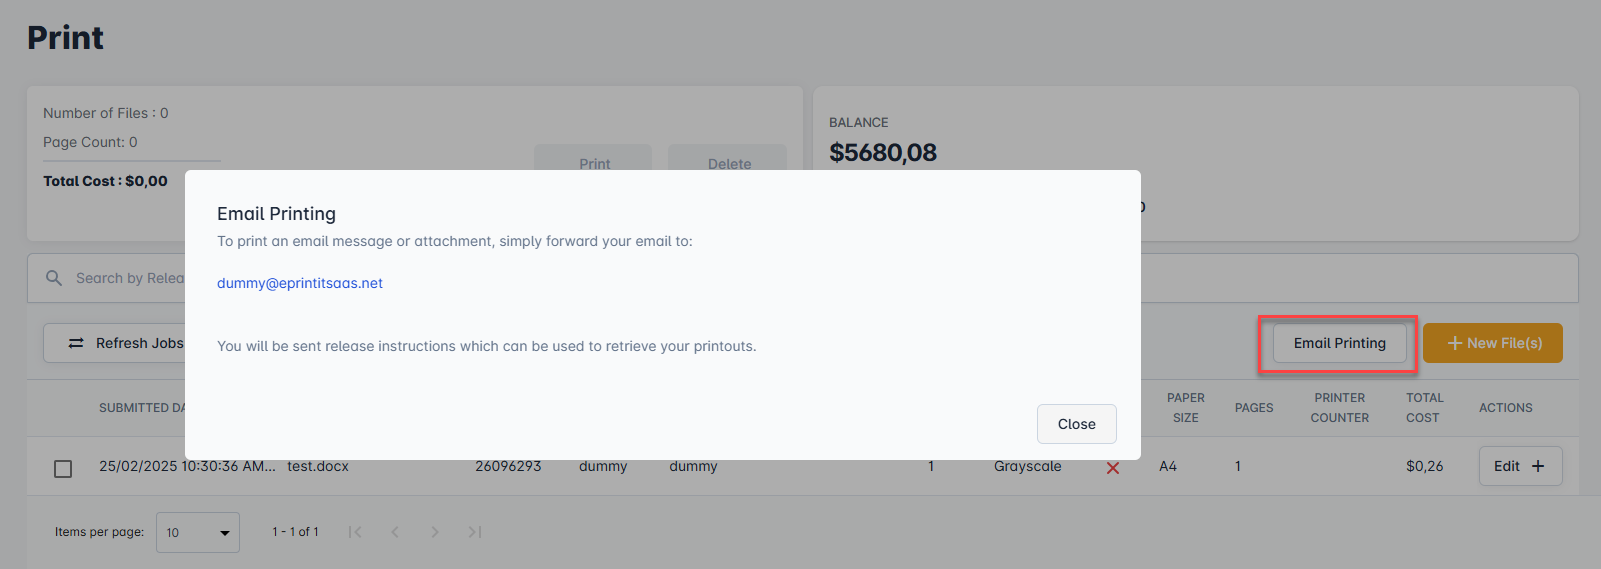
Email Printing
User can also send documents to the displayed email address for printing. User can see the email address by clicking on the Email Printing button.
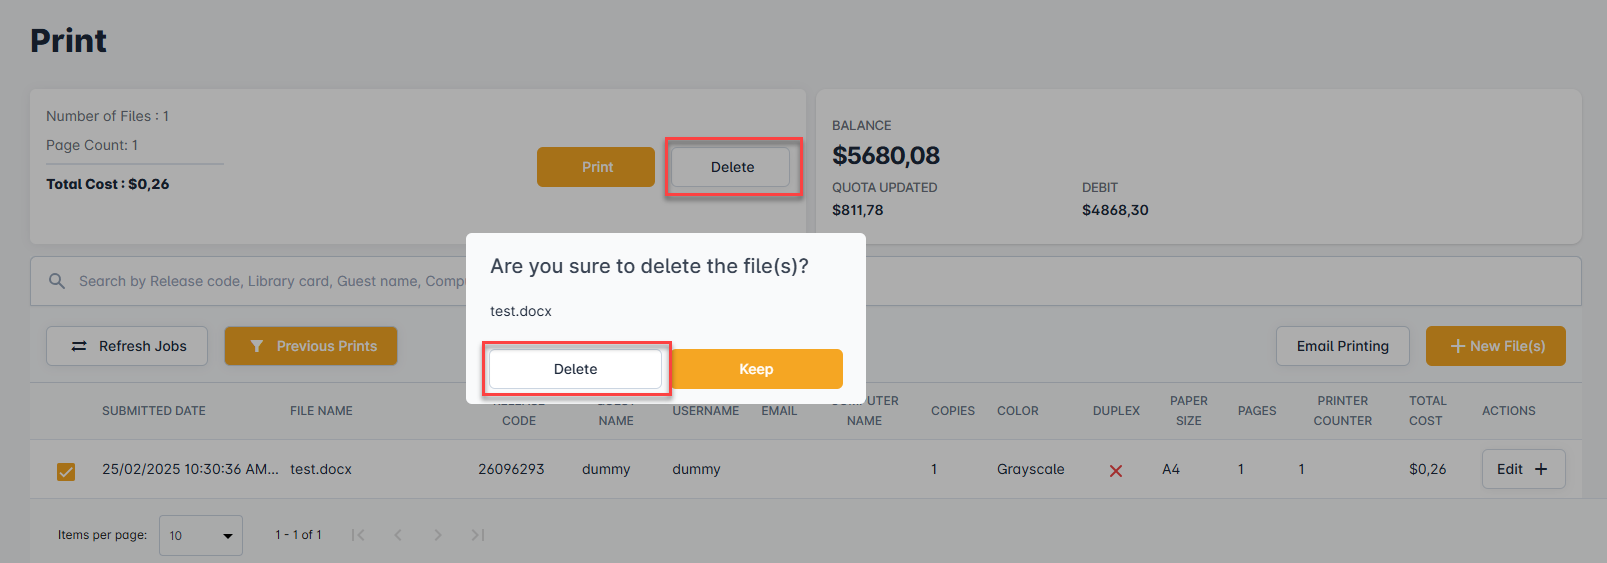
Deleting a Job
Under Previous Prints option, user can see the printed jobs. For deleting a job, user have to check the checkbox and click on Delete button. User can select multiple jobs for deleting.