
Jobs
Jobs
The "Jobs" functionality in ePRINTit SaaS provides users with a way to manage and release the print jobs they have submitted for printing. Here's a description of how this functionality works:
Accessing the Jobs Section
Users access the "Jobs" section within the ePRINTit SaaS application, tapping on "Jobs" icon.

Viewing Submitted Print Jobs
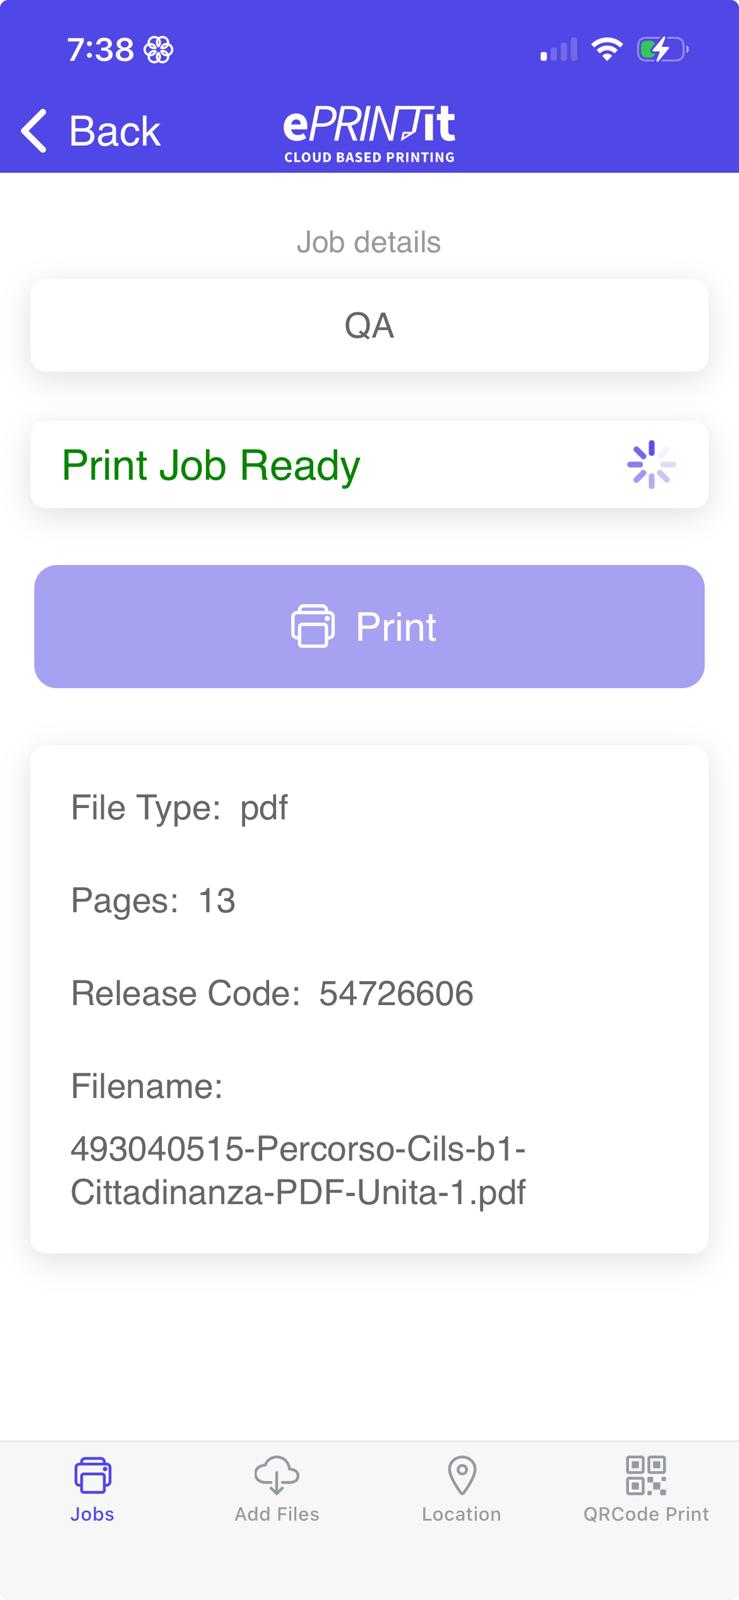
In the "Jobs" section, users can view a list of print jobs they have submitted. To check the job details user need to tap in the selected job.
Status Indicators
To check the job details user need to tap in the selected job. Print job statuses are indicated with icons and text to provide users with quick information about the job's progress. ePRINTit SaaS statuses include "Job Processing" "Print Job Ready," "Completed," and "Cancelled."
Job Actions
Release for Printing:
To release a print job for printing, users tap on a "Print Job Ready”.
Charge For Usage
When the “Charge for Usage” feature is disabled, the application must adhere to the following guidelines:
Job Costing:
All job costing processes must be completely disabled. The system should not calculate or display any costs associated with job submissions.
Price Display:
No pricing information should be visible on the job list or upload pages. This includes:
Elimination of individual job cost estimates.
Removal of any total cost summaries for job groups or categories.
Currency Symbols:
All currency symbols (e.g., $, €, etc.) must be removed from the interface. This ensures that users do not encounter any references to pricing.
Enabled “Charge for Usage” Scenario:
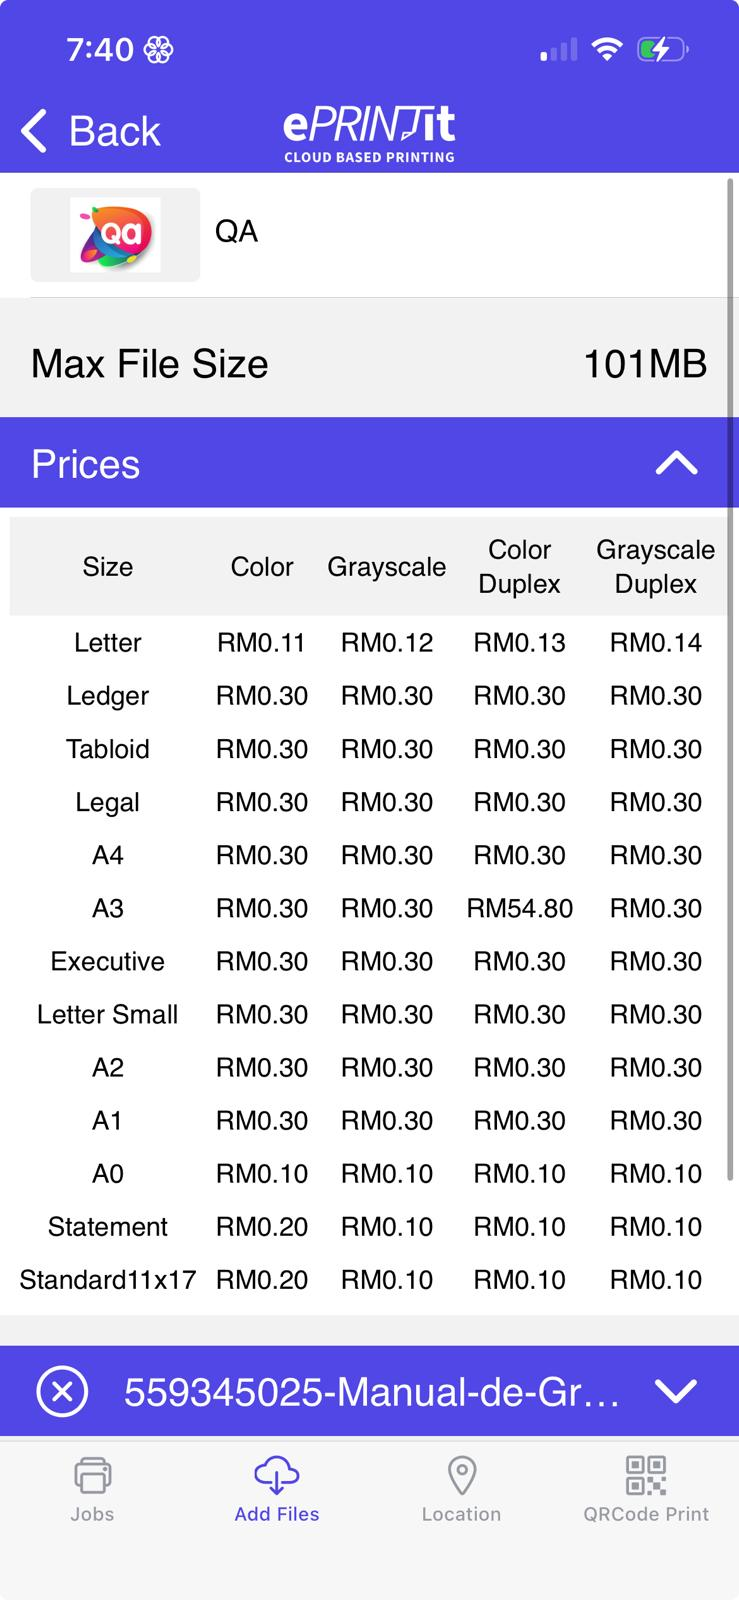
If the “Charge for Usage” feature is enabled from the job list page, the application will display configured costs based on specific parameters, including:
Paper Sizes: Costs for various paper sizes (e.g., A4, Letter, etc.).
Print Configurations: Costs will vary based on print configurations, such as:
Color Printing: Pricing for color print jobs.
Grayscale Printing: Pricing for black-and-white or grayscale jobs.
One-Sided vs. Duplex Printing: Different costs for one-sided and duplex printing.
Cost per Page: If this option is enabled on the upload page, the system will calculate the total cost based on the number of pages and selected configurations.
The “Charge for Usage” feature is available in Joblist Settings in ePRINTit SaaS Portal.
Print Job Costing and Balance Check
The conditions under which print jobs are charged, how job costing is displayed, and when to check the user's balance before releasing print jobs.
Job Costing Conditions
Job costing will be displayed in the following scenarios:
Show Prices: If one of the the Show Prices options (Show Joblist Pricing or Show Cost Per Page) is enabled in the upload page configuration (Customization Data).
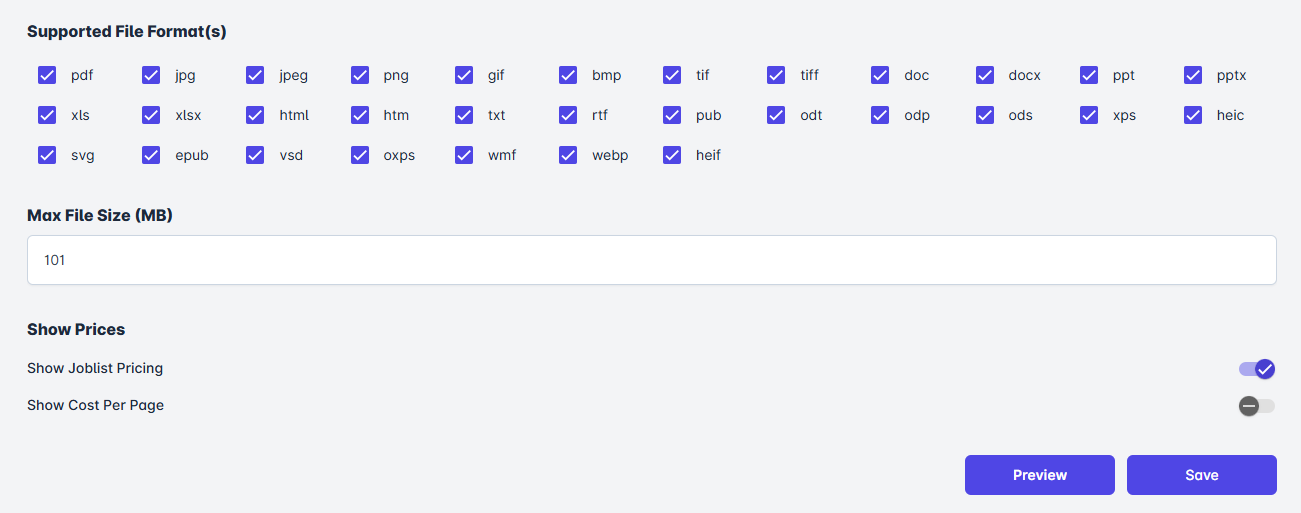
Charge for usage enabled: If the Charge for usage option is enabled in the Joblist settings page.
When Not to Show Job Cost
Job costing will not be displayed under these conditions:
Charge for Usage Disabled: If the Charge for Usage feature in the job list is disabled or not present.
Show Prices: If the Show Prices options (Show Joblist Pricing or Show Cost Per Page) is disabled in the upload page configuration (Customization Data).
Balance Check Conditions
When to Check Balance Before Releasing Print Jobs
A balance check will occur before releasing print jobs only under the following condition:
Charge for Usage Enabled: The "Charge for Usage" feature in the job list must be enabled.
When Automatic Print Delivery field is enabled in PRINTit SaaS portal, the balance will not be updated immediately.
Special Case: Zero-Cost Jobs
For print jobs that have a cost of $0.00:
If a job's cost is $0 and the user’s debit or quota balance is also $0, the application will not prompt the user to check their balance. Such jobs will be released automatically without any balance verification.
Summary
Display Job Cost: When Price List or Cost Per Page is enabled.
No Job Cost Display: When both Price List and Charge for Usage are disabled, or Cost Per Page is disabled.
Balance Check Required: Only when Charge for Usage is enabled in the job list.
Confirmation and Payment (if applicable):
Payment Information: In cases where printing is not free or requires payment, users may be prompted to review and confirm the cost of printing before proceeding.
Payment Methods: Users may have the option to choose a payment method or enter payment details if necessary.
In summary, the "Jobs" functionality in ePRINTit SaaS provides users with a streamlined process for managing and releasing print jobs. It allows users to select and configure print settings, choose a printer, confirm the release, and monitor the status of their print requests. This functionality enhances the user experience and ensures efficient printing within the ePRINTit SaaS ecosystem.
Job Configuration
Once selected the files, the ePRINTit SaaS will look for nearest locations to print the document. To get more information about locations and how to select a location to print the documents, click here.
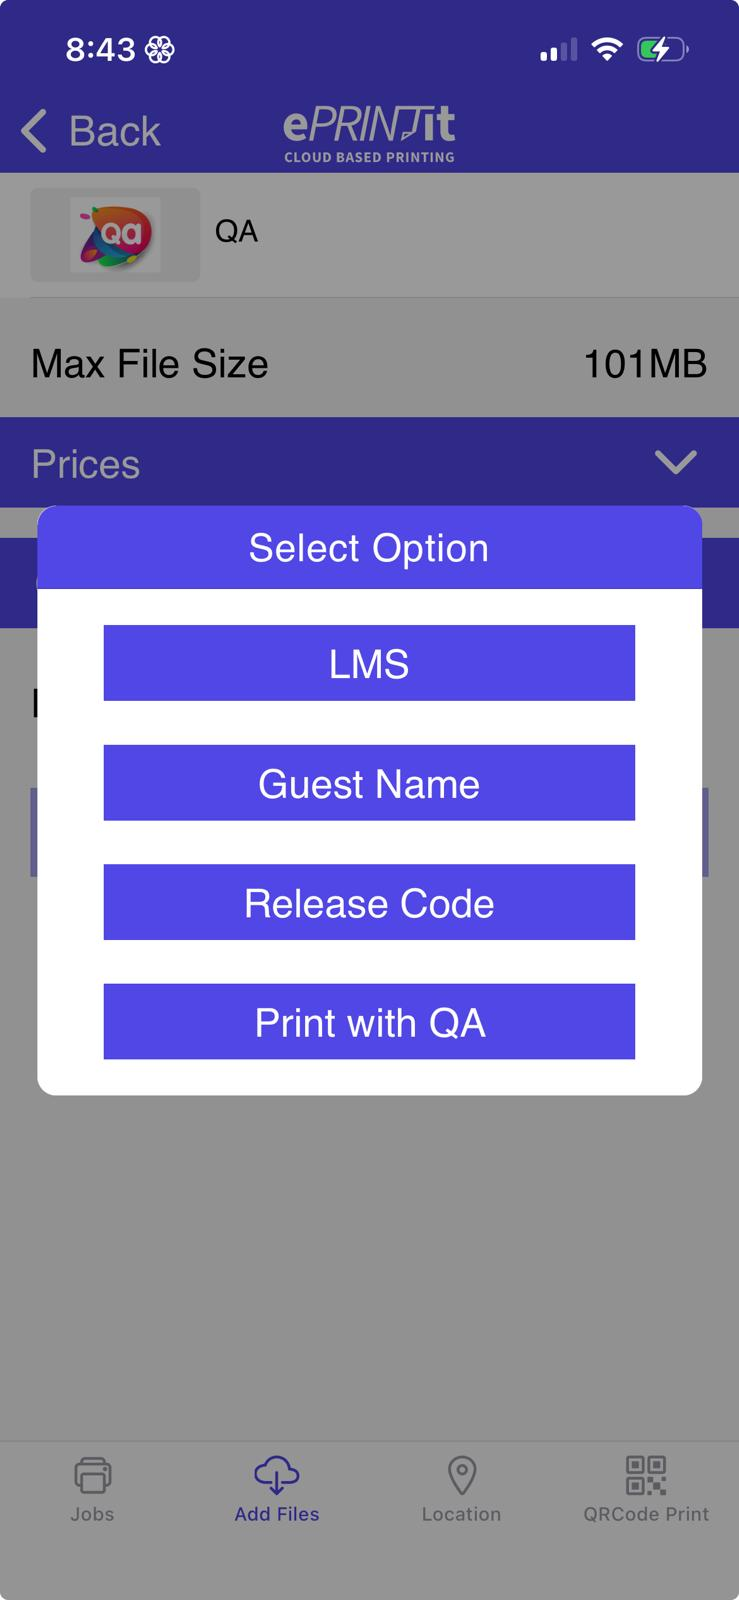
Users will be provided with the options they want to use to retrieve their print job. This list include LMS User/Guest Name, Release Code or Account Login.
If selected LMS, users will be required to inform the LMS credentials to authenticate in LMS system and upload the file with a valid LMS username.
If selected Guest users will be required to inform the name to be used to locate their print jobs.
If selected Release Code, users will not be required to inform the name to be used to locate their print jobs. A Release Code will be provided after the job submission.
If selected the account previously added and authenticated, user will not be required to inform the name to be used to locate their print jobs. For more information about Login and how to add an account click here.
Job Confirmation
Users review their print job details and confirm the submission. The ePRINTit SaaS application sends the print job to the selected printer at the chosen location.
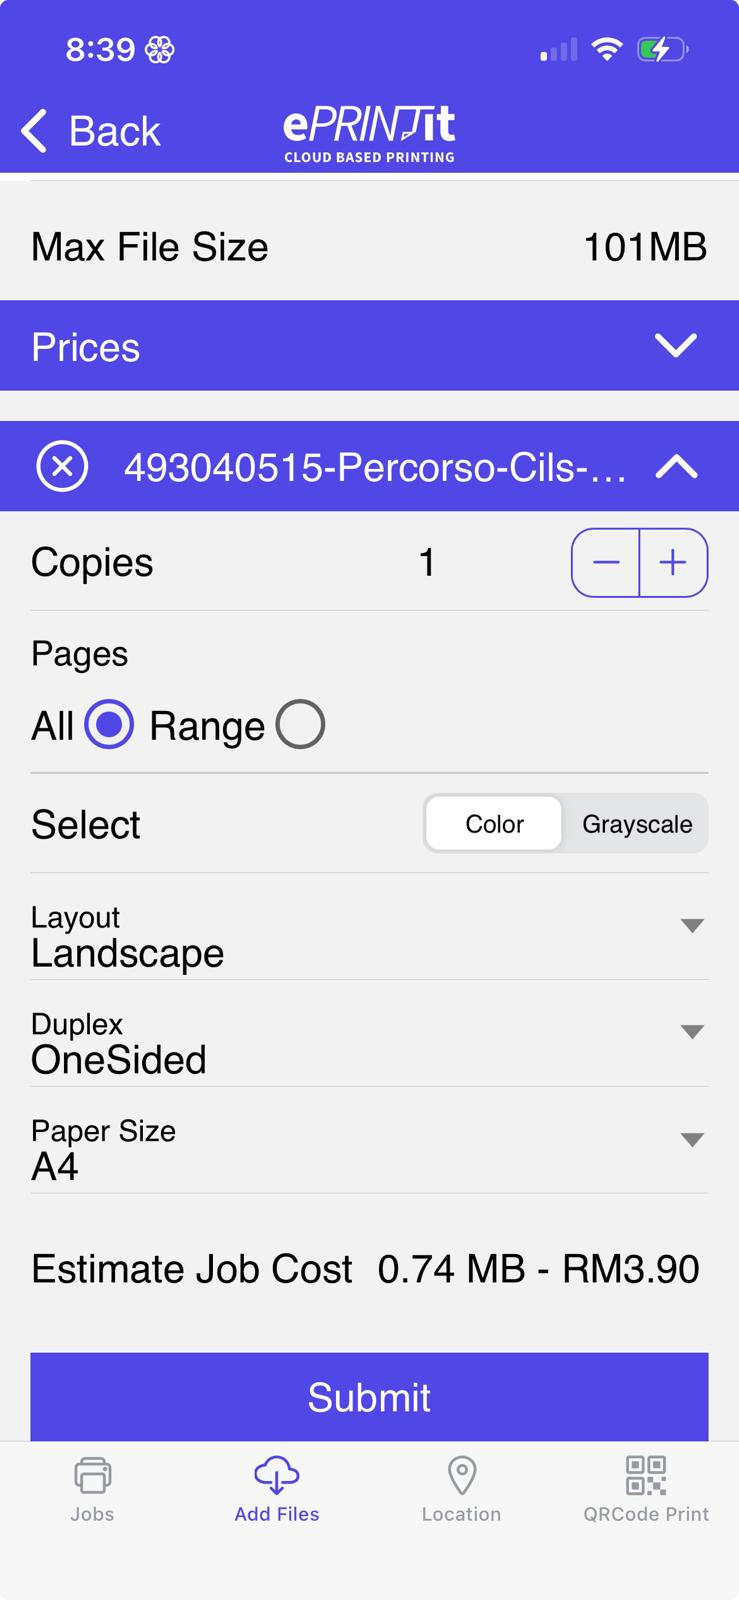
Users have the opportunity to configure print settings such as paper size, orientation, color options, and the number of copies before sending the print job.
Once satisfied with the selection and the estimate price displayed, users tap on "Submit" button to upload the job to be printed.
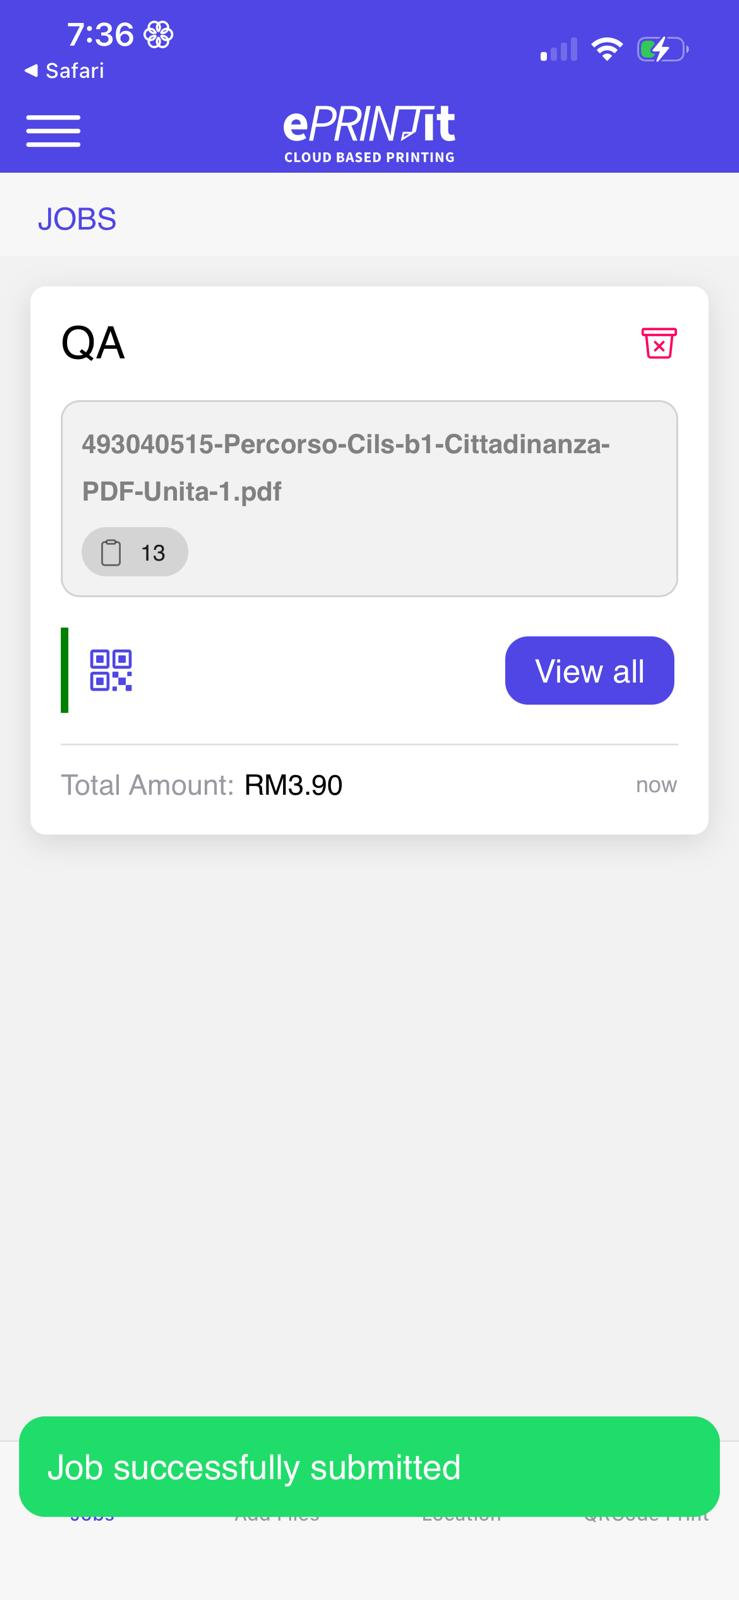
After submitting the files, users will be redirect to the Jobs area indicating that their print job has been successfully submitted. For more information about the Jobs, click here.